
Continuing the Process
I have since built a sketch in Illustrator, so you can have an idea of the initial concept and the variations I played with. As you can see, I utilized the bolero style, and the extended cap sleeve. I then added the wide sleeve cuff. The two places where I spent time to experiment, were
* The style of collar,
* Whether to create the lower garment band as a knit, or as a self-fabric.

As you can see, I have three variations. I have firmly decided on the rectangular collar. I will probably leave my options open on whether to knit the ruffle band on the bottom of the garment, or to use a self-fabric. At the moment I am siding with self-fabric.
Finding the Yarn
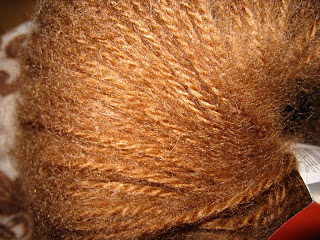
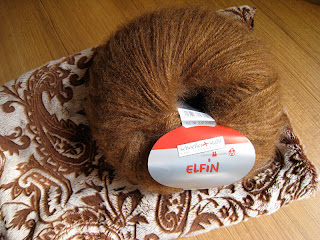
As I am on the road,(traveling for sabbatical research) and don’t have access to my stash of yarn, I am forced to go out and find the yarn in a shop (oh dang…). I have found that sometimes it is hard to find a yarn store overseas. As luck would have it, when in Austria, Ursula and I happened upon a yarn store that was newly opened. The name of the shop was Andrea’s Wollstuberl (see prior blog), and Andrea is the owner. This shop is in Wattens, Austria.
I took my fabric with me to the store. We laid it down on a table, and then began to go around and find yarns that might work. One must decide what is the most important thing in the decision. I decided that it would be color in this case. I looked at a few variegated yarns that were subtle in their color blend, but they seemed to fight the business of the fabric. So, in the end, I settled on a solid mohair yarn. The fuzziness of it is fine for this purpose, as it works with the fur nature of the fabric. I will need to knit double-strand, so will have to do a little experimenting. I am fine with needles, as I brought along my set of Yarn Pick’s wooden needles (which I love dearly). First, they are beautiful to look at, and second, I have complete flexibility, as you simply change the needle tip to get to a different size of needles.

Finalizing and Printing the Pattern
Back to Garment Designer…
For now, I am only concerned with getting the pattern for cutting out the fabric. So, I return to the program, and confirm my design decisions.
Prior to printing anything, I always request the Information and Recommendations window, so that I can see if there is anything I have overlooked. Garment Designer automatically measures all your seams and looks at the angles where corners meet to ensure that you will have nice transitions when you join two pieces together. Use the Generate>Information and Recommendations command for this. When the window opens, I look to see if there is anything in red. If there is, I need to either fix something, or be aware. In the case of this jacket, all was well, so I have no corrections to make.
Now.. to printing.
Note… The following seems like a lot of steps, but they become automatic. I do them all with the keyboard, in about 3 seconds.

I always print a schematic of the pattern. First, I move into landscape mode (File>Page Setup). Then, I turn off the grid (Display>Show Grid), and leave all seam allowances off (Additions>Enabled Additions…) so that the dimensions are easy to read. I will use the schematic on the front of the pattern packet I will build. I can choose to leave the sloper on or off.
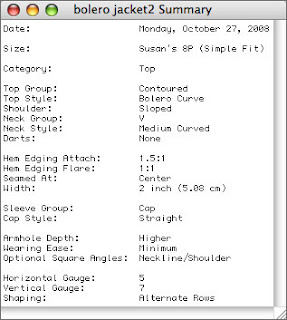
I also print out the Project Summary, as it reminds me of all the options I chose when building the garment.
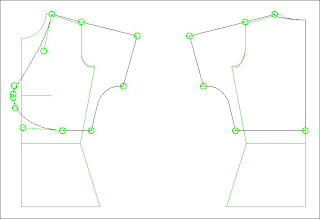
Sometimes I turn on the option to see what points I moved, and print this as well. This will remind me how much I altered the original choice of options. Use the Display>Highlight Moved Points menu command to do this.
Once the schematic is created, I put the seam allowances and grid back on, turn off the dimensions (Display>Show Dimensions), and zoom to actual size (Display>Scale to Actual Size). I also turn on the Final Pattern mode, so that I can see the notches (Display>Final Pattern). Then, I request the print preview with pagination (Display>Show Pagination and Display>Print Preview).
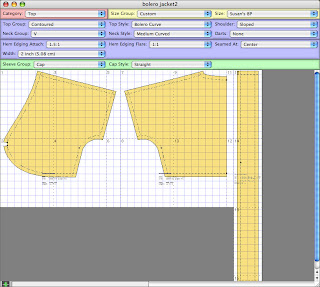
Once I am looking at the Print Preview, I see how many pages of paper it will take to print the pattern. Then, I go to the File>Page Setup (or Print Setup on Windows) and change the orientation back to portrait. I can compare how many pages in both modes, then choose the one I want.
Now… I print. I won’t print the ruffle band at this time, as I am not positive I will use it (as I may knit that piece). As the pages print, they are hatch-marked and numbered, so they are easily put together.
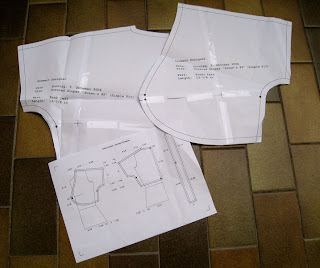
Taping the pieces
I am rarely anal, but when it comes to my patterns, I like them to look nice, so I take the time to cut off the excess paper from the right side and lower edge of each pattern piece. Then, I have a well, on the left and upper sides.
I now tape all the pieces together; first the columns (A1, A2, for the first column, B1, B2, etc. for the second column). Then, I join the columns. This has a rhythm for me, and I have become quite quick at it.
I generally cut out the pattern after that (another anal thing, as I will be cutting it shortly in fabric)… and I am ready to go.
Time to cut the fabric!.... to be continued.
7 comments:
Thank you for going through the process like this. It is really helpful to see! I need to get so much more comfortable with using the programme myself and seeing how you use it, helps. Of course, I do need to figure out why it isn't working on my laptop as I seem to be living off that with all my travel at the moment.
But you are getting me excited about designing while I'm on the go. So when I'm done here, I'm sending an e-mail on my error message!
Please continue doing this. It is really helpful to see the process. It is also enjoyable reading about your adventures. I thought I was having fun living in Hong Kong more & more now but wow, time for Europe!!!!!
I'm adding my thanks to those of Cindy. I think I said before that I have been thinking of purchasing the program so it's nice to see it "in action".
I am primarily a knitter but have been toying with the idea of combining the two as you are showing here. Thank you so much.
Hi Susan,
Some one emailed this question - I thought I would post it here - maybe someone else was wondering the same thing.
"Hi Sonia.....
I was reading up on Susan's blog on the bolero she's designing and I
was trying to do it on GD, but I couldn't figure out how she got the
rectangular collar. Are you able to tell me?
Thanks
Carla"
In the Summary Picture it says "Hem Edging" - so I wasn't sure what you were thinking.
Sonia
Hi Susan, I just found your blog and have read it from the beginning. I am really enjoying the project description and learning new things.
I have used Garment Designer and Garment Styler for years and have enjoyed the product enormously - I use it for both sewing and knitting. These days, mainly knitting. But I certainly have not used it that much for complicated designs, such as the one you are describing on your blog.
I am looking forward to your description of how you create the neckline and the knitting instructions for that.
Now that I am semi-retired, I am doing a lot more knitting and am finally looking forward to getting to use my Knit Bitter - gosh, it has been so long that I don't remember the name.
Anyway, Susan, love the blog and envy your trip.
Jane
hi Cindy..
we can sort out your laptop... we soon will have a USB key which will simplify everything.
Susan
Response to all
Carla... the rectangular piece you saw was for the ruffle at the bottom. I have not shown you how I get to the collar yet. That will be coming. It is now knit.
Susan
thanks for the comments all.
oh sorry..
the ruffle came from the Extras menu... Edging.
susan
Post a Comment