 |
| Design with imagery in Garment Designer Pattern |
African Culture Transformed into Fashion
Recently, I oversaw a project at Mesa College in San Diego, which involved a partnership between our Fashion students, the Mesa African Art collection, and Visions Art Museum in San Diego Liberty Station. There were several aspects to the project, but the final activity was a fashion show featuring African-influenced clothing.
Many of the garments came from my Textile Design students in my Fall semester class. I decided that I too needed to get involved, and so embarked on two different
design projects. In this blog, I’ll share the first with you.
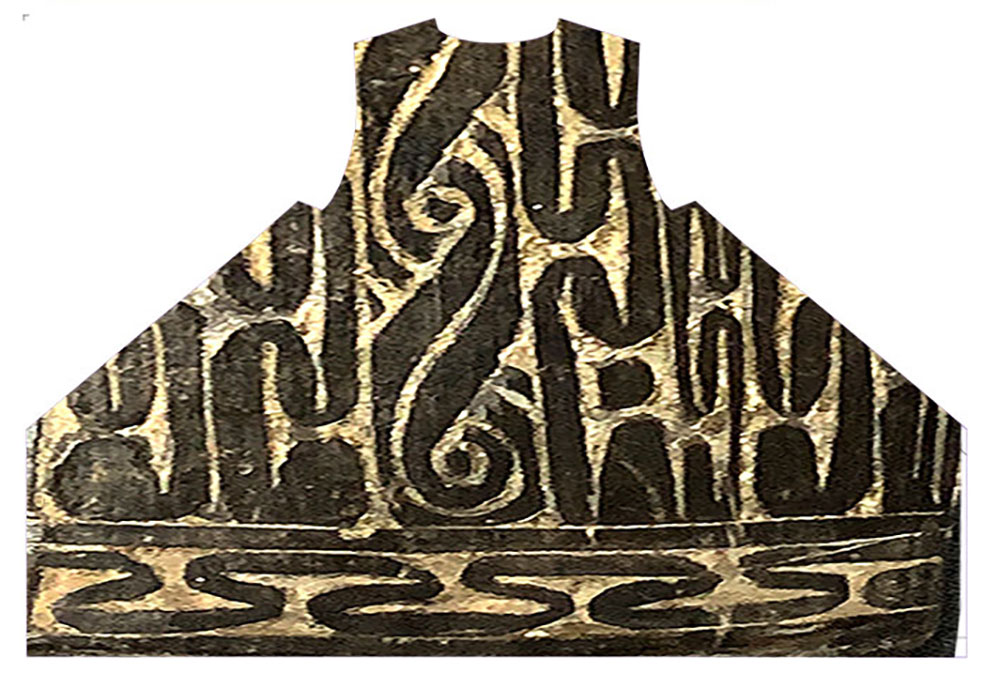
My source of inspiration was a piece of carved wood. Sad to say, I don’t know future details, only that I took the photo while we were visiting the artifact collection.
Since the original wood piece was rounded, I had to use Photoshop to straighten it out a bit.
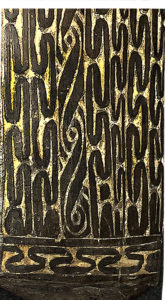 |
| Photo of Inspiration: a piece of carved wood |
I wanted the garment to be relatively simple, free of internal structural lines, so that the wood imagery would be seen as it was designed.
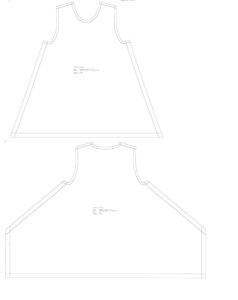
Below is the pattern I settled on. This was modeled after a top I own that I purchased in Japan.
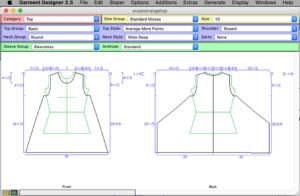 |
| Pattern created in Garment Designer pattern software |
There I opened the large pattern pieces (each on a separate page), and I brought them together into one document. The width of this document was set up to the width of the fabric I wanted to print on (which was a polyester chiffon, 58” wide).
 |
| Layout in Photoshop (sorry this is a LARGE file and so doesn't downscale well) |
Working between the imagery document and the Garment Designer pattern document, I used Selection tools, and copy/paste to bring the images in. I orchestrated a border
effect on the bottom and stretched the imagery to fill the space above. You can see the results below.
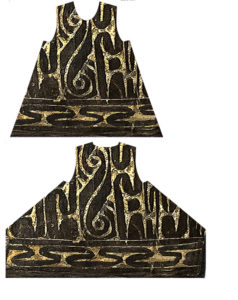 |
| Garment Designer pattern in Photoshop with the imagery engineered into place |
 |
| Extra imagery is added to the file to provide trim fabric |
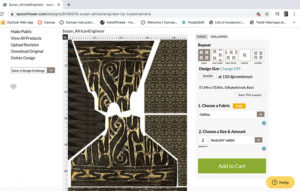 |
| The order process on Spoonflower a company that digitally prints fabric |
One of the beautiful things about engineered design, is that you don’t ever print a paper pattern. Instead, your fabric arrives with the garment piece all laid out and ready to cut. Here is my fabric just before cutting.
 |
| Fabric ready to be cut. Note how similar this is to a cookie cutter approach! |
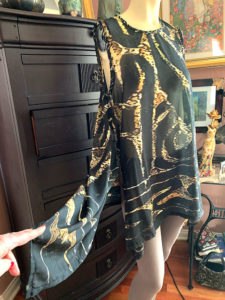
I used some of the trim areas to make the binding for the neckline and armholes. These were cut on the bias and applied to finish the edges. The most challenging part of the construction was sewing chiffon on a bias grain. I simply serged the edge, pressed it under and top stitched it in place, attempting to have minimal handling.
The garment was complete, and ready for the show.
 |
| See how the back cut is different from the front |
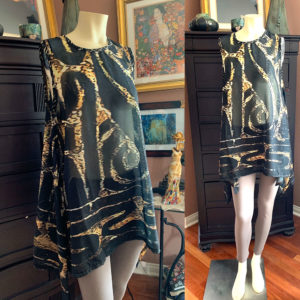 |
| The final garment, yea! and in time for the show |
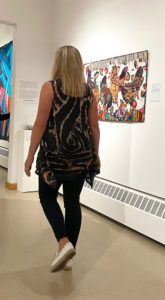 |
| Alys modeling the top at the Fashion Show at Visions Art Museum in San Diego, CA |
And I course, I love Garment Designer. It is such a creative tool; I can do most anything with it and in very short order, and of course, because it knows my body measurements, I never have to alter. Can life get any better?

No comments:
Post a Comment