Before I start making the pattern, I generally make myself go through the following list of questions..
1. What basic pattern pieces will I need?
2. Do I need any additions (e.g., facings, extensions, etc.)
3. Do I need any extra pieces (e.g., bands, pockets, etc.)
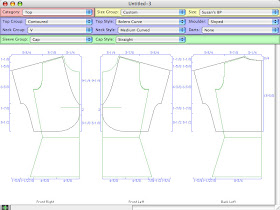
I chose to build the basic pattern for this project, while at the Novi Show. That way, I would know exactly how much fabric to purchase. So… in Garment Designer, I began by choosing my personal Sloper. This way, the program knows my personal body, and I can avoid the typical pattern alterations I would have to perform to a standard size. I no longer need to shorten the waist, narrow the shoulders, and adjust the sleeve length. What joy!

Next, I chose the following style options:
Top Group: Contoured
Top Style: Bolero Curve
Shoulder: Sloped
Neck Group: V
Neck Style: Medium Curved
Darts: None
Sleeve Group: Cap
Cap Style: Straight

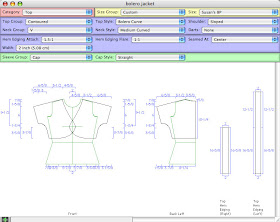
Next, I used the ability to edit points and lines to move the armhole of the sleeve down some, and to move the neckline back just a bit. I turned on the view of both sides of the front, turned Front/Back symmetry off, and then edited the center front of the garment so that the fronts would overlap slightly, to allow for my button.
I then, used an Extra, called Edging, and chose the edging for the hem of the garment. This allowed Garment Designer to measure around the hem of the garment and create a straight band edging. I wanted it to be gathered slightly, so I chose to change the Hem Edging Attach: to 1.5:1. This is probably more than I want (in fullness), but for the moment, I shall plan for it, and look at it pinned on the garment prior to sewing. I often work this way.

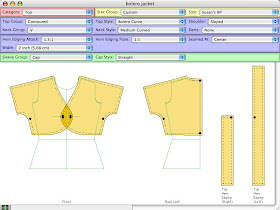
Once all was in order, I saved the file. Then, I added seam allowances, and turned on the Final Pattern view, which would be me notches for matching.
Fabric Needs?
To determine how much fabric I would need, I requested the Pattern Layout option in the Generate menu. A new window opened, and in this window I could drag my pieces around, flip them, rotate them, etc., to determine how much fabric I would need. This is just like doing a layout on your real fabric. I LOVE this feature. It has always been a game to me, to see how good of a layout I can get.

At this point, I went over to Haberman’s booth and bought the fabric. I needed 5/8 yards. I generally buy just a little extra, for testing, etc. So I purchased 3/4 yard.
More to be continued… as the project commences.
Next will be the challenge (and fun) of finding the yarn.
OK, I tried following along with this & it didn't work :) Can you explain more how you make the cross-over part on the front. I tried but I was obviously doing something wrong! Thank you
ReplyDeleteHi..
ReplyDeleteSorry, I missed this. I am still learning the system.
To make a cross-over front.
1. turn on the view of both left and right front, in independent mode.
2. Turn off Front/Back Symmetry.
3. Click on the front points you want to change, and drag them away from center front.
If you want to see how the overlap looks, you can view the pieces in adjacent view. The keyboard shortcut for this is...
click inside one of the front pieces, and press 'a' on the keyboard. To make the pieces independent again, press 'i'.
Susan
Great, thanks. Got it. I also needed to reduce the little bar that was on the center front so that it made more of a curve than a straight line. forgot I could move that. thanks
ReplyDelete